I want to start by saying "hello" to my followers, and "welcome" to some new faces today! I have lots of pictures and lots of info to share with you today.
This is the 6th stop on the Project Life Blog Hop hosted by Margie from the Nihao, Cupcake! blog. I'm so glad to be a part of such an amazing blog hop - there's some great talent being shown today! You can scroll down to the bottom of this post to get to the next stop. Be sure to visit everyone!

I just wanted to take some time to go over some things I've done and things I've learned about Project Life so far this year. After all, we're 25% done for the year - and I'm proud to say that I'm staying caught up and have completed Week 13. When I've been a week or two behind, I've been able to take an afternoon and get caught up. I started a few weeks into the year, so I'm not quite caught up with posting my weekly spreads. I'll be current within a week or two though. I keep up with all of my Project Life inspiration on my PL Pinterest board.
If you've been following my blog for a while, you already know that I made my own kit from my scrapbooking stash. I've added printables from Pinterest and made some graph paper journaling cards to use throughout the year. I also bought a Project Life grab bag from Studio Calico. At first I was trying to stay cohesive with my color choices, but I tend to like a little bit of everything. So maybe it's not all perfectly coordinated - but it works for me! I'm doing two-page spreads each week. I've added inserts on a couple of weeks. I have a variety pack of pocket pages from Becky Higgins. I've bought some different configurations from WRMK at Michael's. I even used baseball card pages for one week (my favorite week so far!)


When I made my first layout for Project Life, I felt very overwhelmed and didn't know where to start! It's taken a few weeks to find my stride, but I think I have found a method that works for me.
First of all, I use an app called Momento on my iPhone to keep up with my daily activities. My pictures automatically sync with my Macbook, so they are always up to date. I also keep 'stuff' (tickets, handouts, etc). in a certain place so I can easily access them each week. I encourage my husband to send me pictures that he takes, so my PL won't just be a reflection of my own life. When he sends me pics, I save them to my camera roll so they will sync to iPhoto. I already made my 'week' cards for the year, so I pick one to use for the current week.
Each week, I get out my PL notebook and make some quick notes about the week. It's easier for me to have things written out. I look at Momento and write down what I did for each day, and look at iPhoto to see if there are any pictures I want to include. I don't include every single thing in my Project Life, but this helps me narrow down what I want to include.

I then try to figure out where I want all the pictures to be. I go ahead and print the pictures I want to highlight for the week and then try to fill in the gaps. I've had a lot of success writing topics and notes about pictures on post-it notes and sticking them on the pocket pages. This way, I can easily move them around if I change my mind. Then I know which size to print the rest of my pictures.

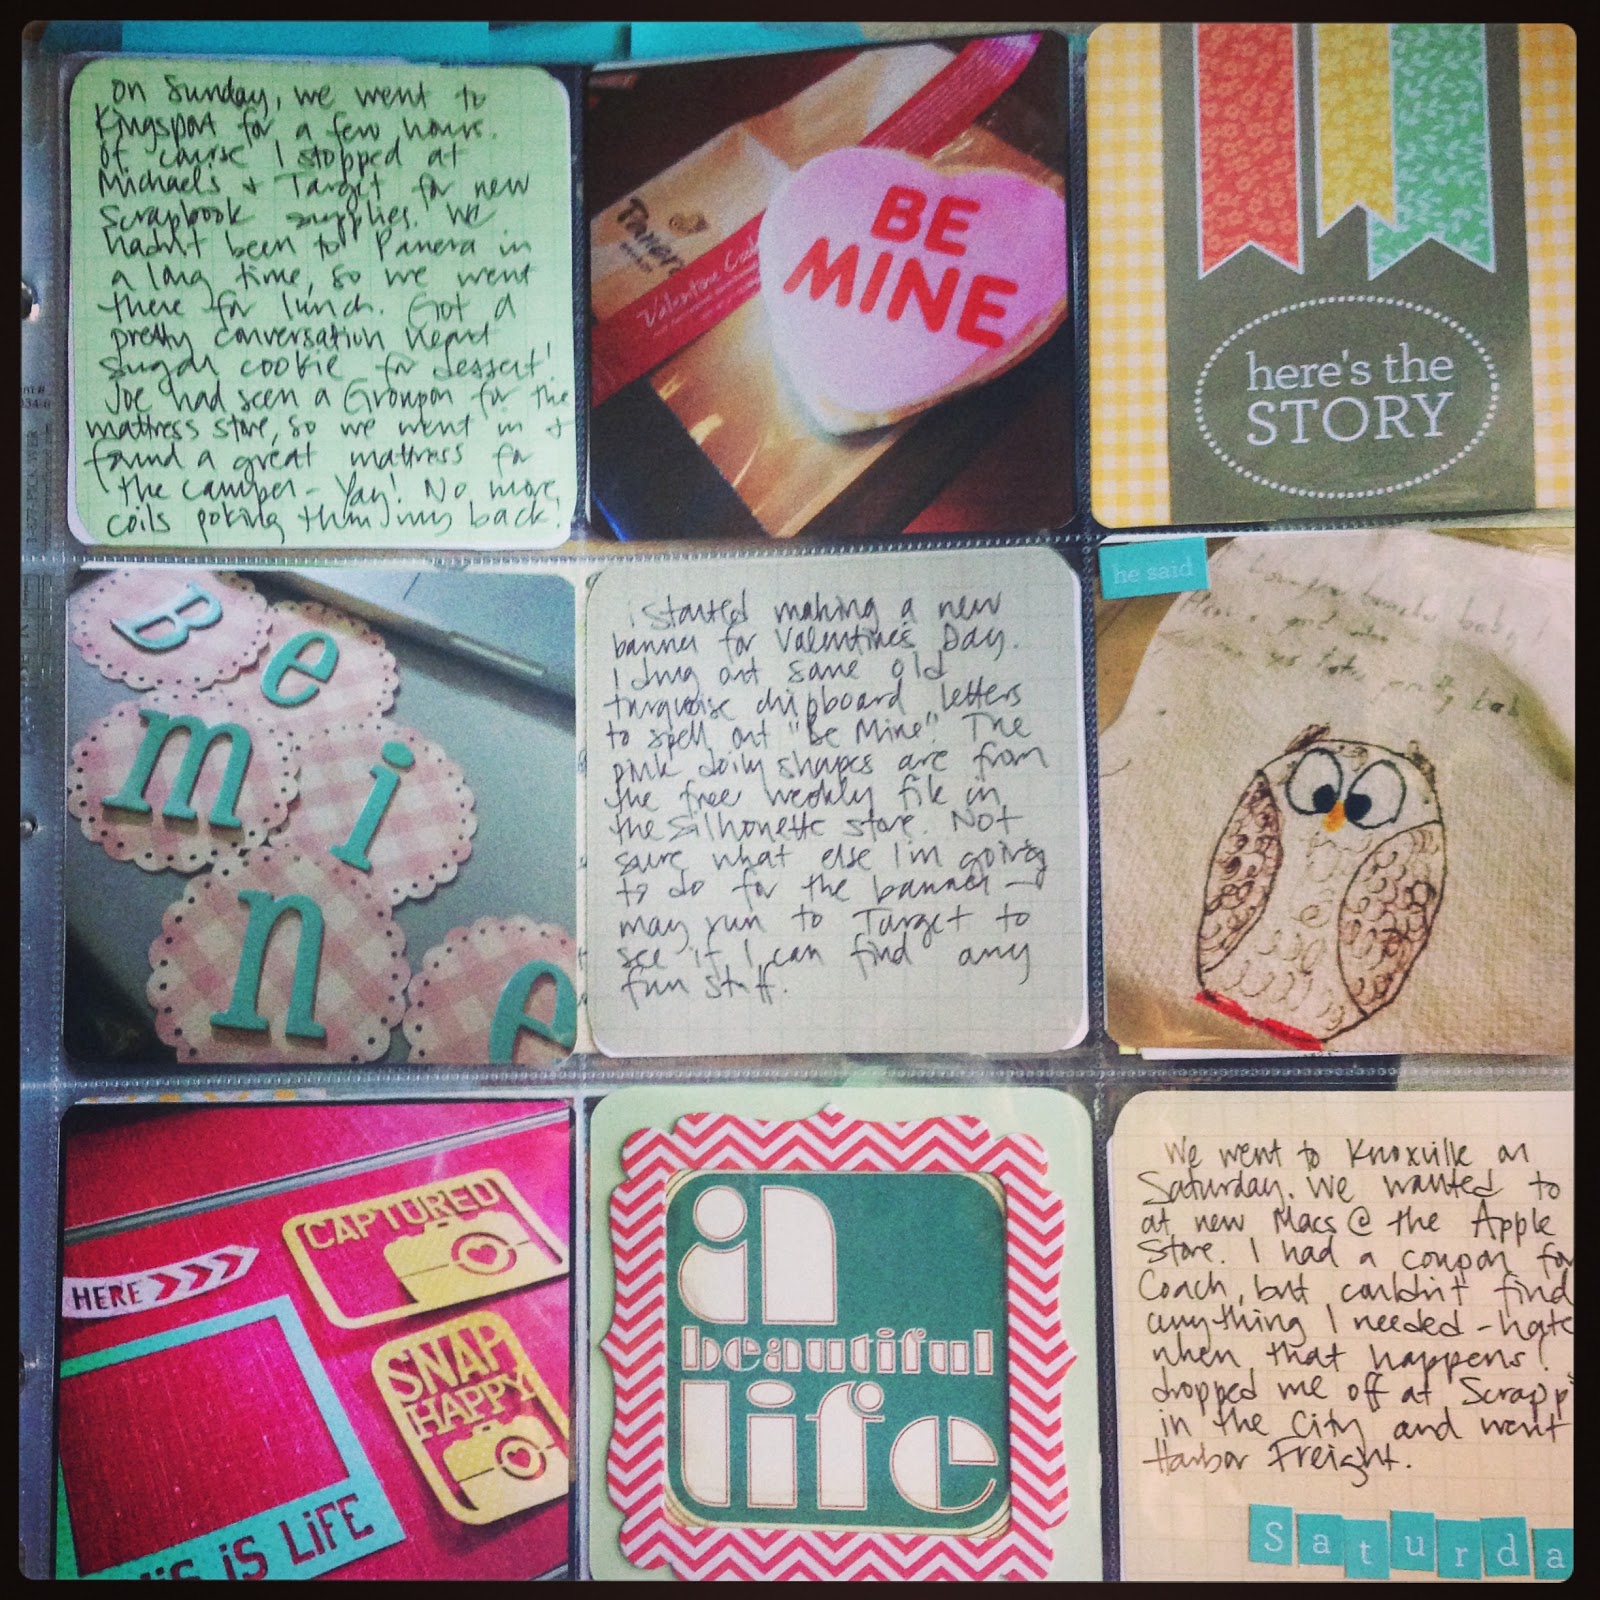
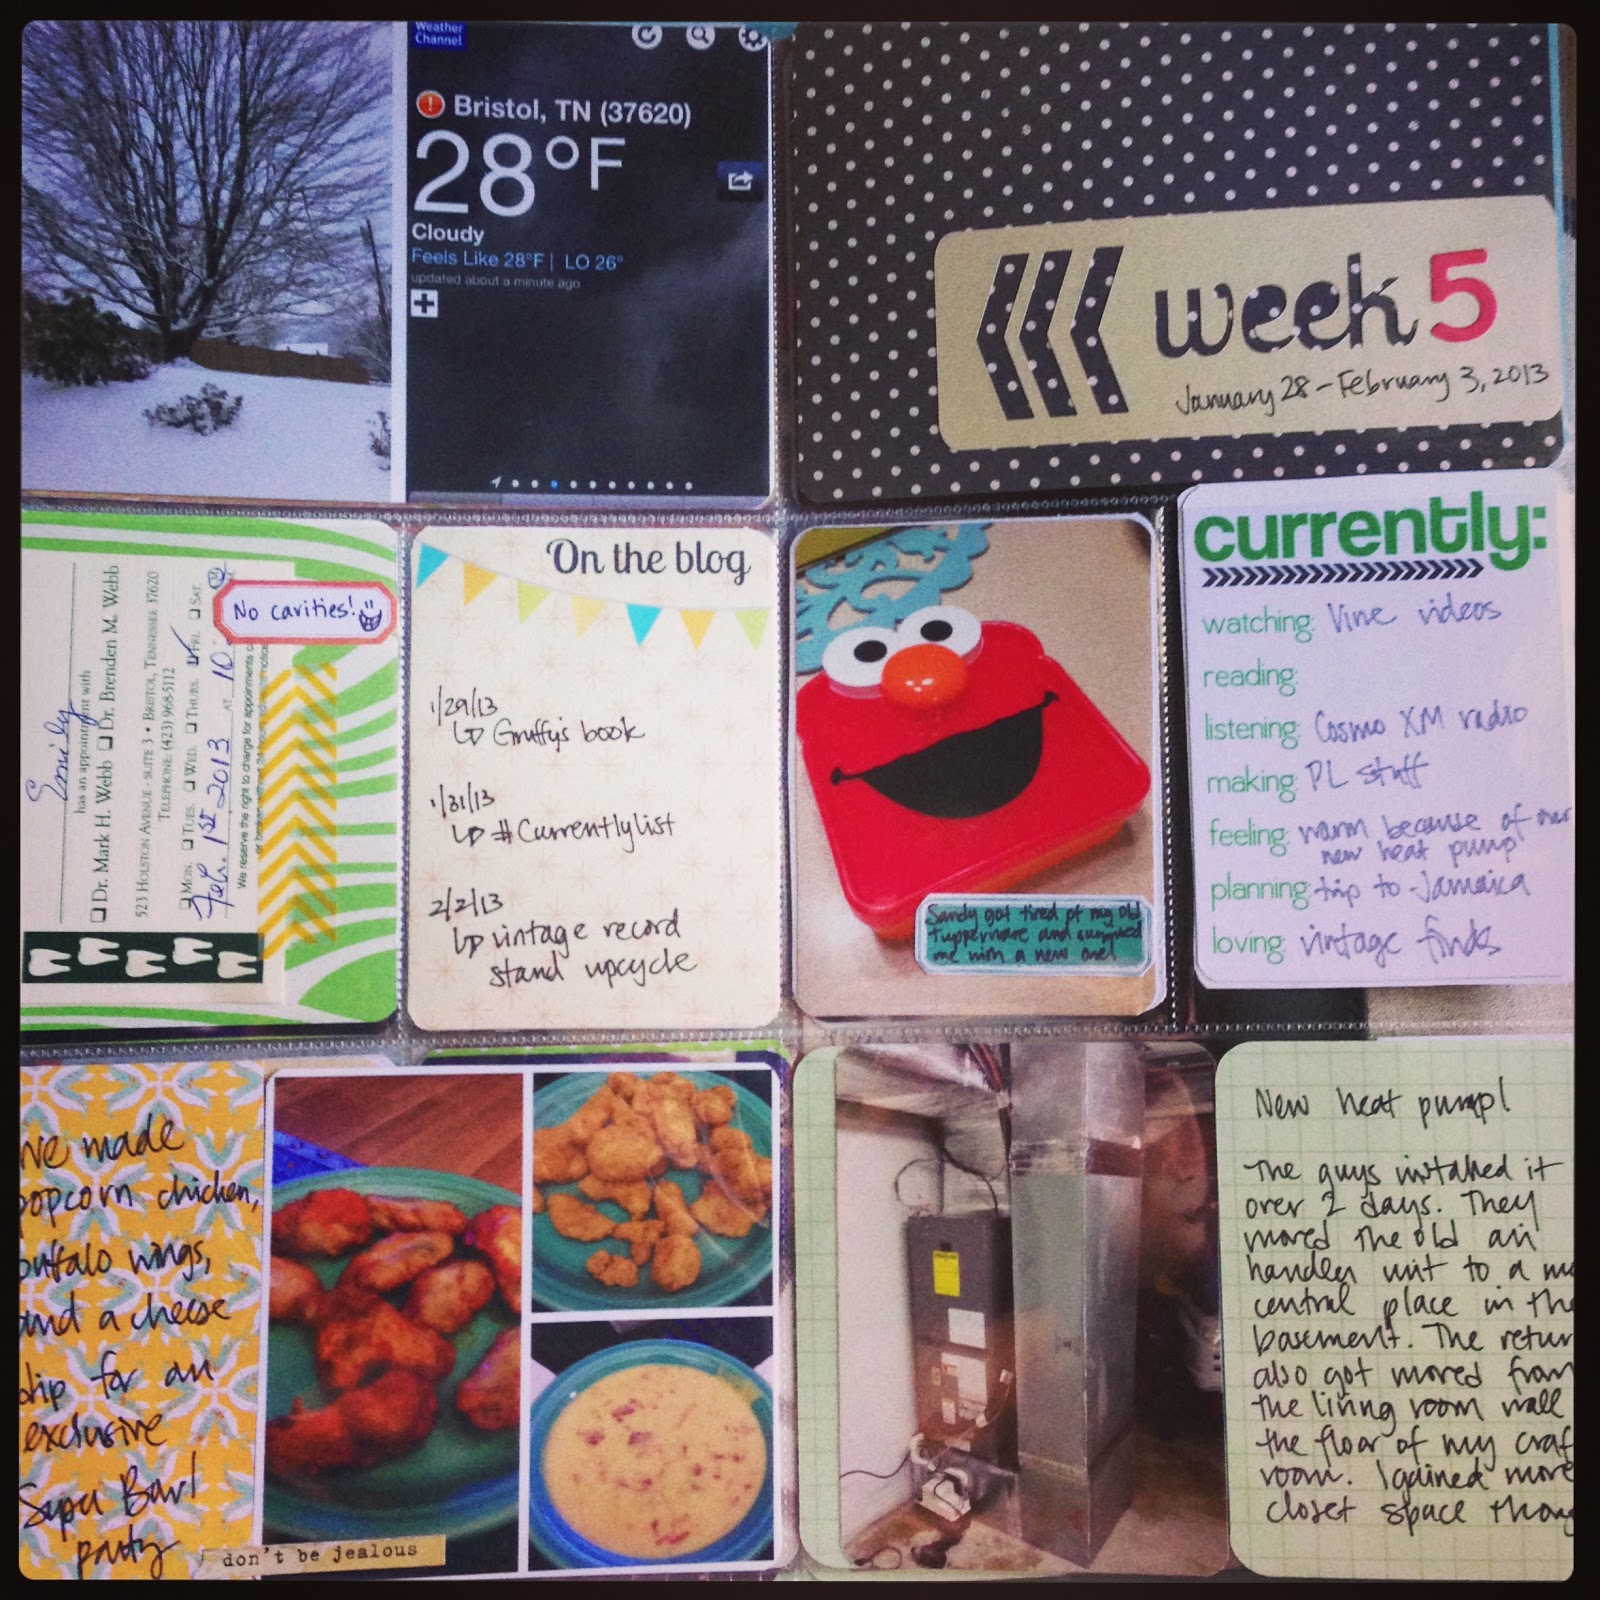
There are some things I include every week - a #currentlylist, an 'on the blog' journaling card that I made, and my mani/pedi. I just started my blog this year, so it's really important to me. I include my mani/pedi because that is my "me time" and I want to remember all the fun things I had done to my nails!
I have a small basket on my scrapbook table that keeps stickers, labels, alphas, frames, and embellishments easily accessible.
I bought a medium organizer box from Close To My Heart to store my Project Life cards. I have them divided by vertical and horizontal filler cards, vertical and horizontal journaling cards, and vertical and horizontal quote cards. I use binder clips to keep them separated.

Here are a few of my favorite Project Life pages (with some close-ups) from this year. You can see them all by clicking on the Project Life label on the right side of my blog.


Ok, the next stop is Barbara.
I hope this insight into my Project Life has inspired you on your journey. I'm always on the lookout for new tips and tricks, so feel free to share yours in the comments! Be sure to visit all the great blog hop participants!!
Margie http://xnomads.typepad.com
Michelle http://www.table-for-five.com/
Michelle R http://MichelleRoger.wordpress.com
Emily http://mrscraftyadams.blogspot.com <----- you are here!
Barbara www.maynardpl.blogspot.co.uk <---- go here next!
Michelle B www.michellebostinelos.com/blog
Scruptious http://eversoscrumptiously.wordpress.com/
Rechelle http://Levanfamily365.blogspot.com
I love reading each and every comment!

I think we are PL kindred spirits! I also made my own kit/fill in with freebies and I also use sticky notes to help me plan out my pages. Congratulations on keeping up with the project!
ReplyDeleteGreat minds think alike Brooke! :)
DeleteI couldn't be without my nightly journaling when it comes time to put my pages together Saturday afternoon! It's great when we find what clicks with us isn't it?? :) Great job!
ReplyDeleteIt really is great - I struggled a bit for the first 2-3 weeks, but then I figured it out!
DeleteI love how you include the "on the blog" card. I may have to steal that idea. :)
ReplyDeleteSteal it! I am using a free theme for my blog. I used one of the graphics from the theme to make the card coordinate.
DeleteThanks for sharing your PL insights :)
ReplyDeleteYou're welcome! :)
DeleteI also like the 'on th blog' card idea!
ReplyDeleteLots of great ideas on here Emily! I really like all the different page layouts you've incorporated. Also your organizing system for your cards. I am do my weekly PL spreads digitally, but have started buying a few mini kits, etc. for other smaller projects... Will have to try out that system :)
ReplyDeleteThanks Nicole! That organizer box is awesome for PL.
DeleteLove how you have made this all your own! What fun! Thanks for the inspiration.
ReplyDeleteWow, Emily thanks for all the hints and tips you have on your blog this week. Love the 9 pocket page and how you worked the regular week in on the opposite side. Love the use of the 6 X 6 pockets too. The question you asked me about my page with the skinny pocket that came out of a Stampin Up variety pack I got last year for another intention but it works good for PL. Thanks for sharing
ReplyDeleteThanks Tina!
DeleteInspiring that you've made your own kit. And so many creative and personal touches. I love that you include your mani/pedi each week - these are the awesome everyday details a project like this allows us to capture. Well done! And thanks so much for joining along iwth the blog hop!
ReplyDeleteI do love capturing the little moments! Thanks again for hosting the blog hop, Margie!
Deletelove that you made your own kit! I just got a cameo and I love it. great idea to make your own PL elements. tfs! love your pages - Sonia
ReplyDeleteThanks Sonia! The cameo can really add a lot to your PL pages. I've not used it enough!!
DeleteEmily, that was a great post! I also love to use my Cameo for PL and use CTMH storage. Love your idea of using the binder clips to separate the cards - I ab going to adopt it! LOVE that you include the picture of your nails and "on the blog" cards! I wish I would have pretty nails to include in my layouts LOL I continue to scrapbook regular layouts so from time to time I include a picture of a layout or another crafty project from my blog.
ReplyDeleteThanks Maya! I'll have to admit - a couple of my binder clips are getting pretty full lol! But for now, it's working. I used to bite my nails, so it's a real treat for me to get my nails done and show them off. :)
DeleteI love your style. I will definitely have to check out the Momento app to see if I can use. Look forward to more pages.
ReplyDeleteThanks Michelle! I love your style too, and I'm a new follower!
DeleteCongrats on staying caught up! That's quite a feat. How cool that you made your own PL kit! I made a digital one for myself but I got bored with it too fast or ended up wanting other colors to go with my photos for the week. I like that you mixed together a bunch of different collections - maybe I should try doing that to avoid boredom. It's super impressive how much you've created for yourself in this process.
ReplyDeleteAww, thanks so much! I love to mix patterns together, so I knew I needed to keep it interesting when I made my own kit. I didn't want to get bored with it.
Delete