Project Life Week 16

Tuesday, April 30, 2013


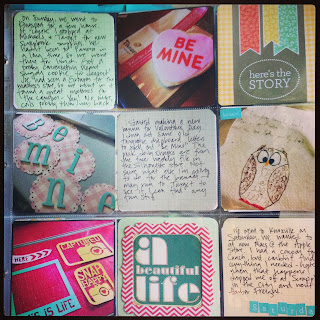
Week 16 was a full week with work, a mani, physical therapy on my neck and shoulder, and a quick trip to Knoxville for a work function and shopping.


Left Side: my gorgeous new Kate Spade spring bag, details about our trip to Knoxville, a great new-to-us mediterranean pasta salad, and a tribute card to remember the Boston Marathon bombings. The "love it", "swoon-worthy", and "it's perfect" kraft stickers are from Colorbok at Joann's. I love them!


I don't have a personal connection to Boston, but of course it affected all of us. I wanted to quietly document the event in my PL. This is a card I received from a Studio Calico PL grab box a few weeks ago. I just added some Cosmo Cricket Tiny Text and October Afternoon Mini Market letter stickers.


Right Side: my mani, my on-the-blog and #currentlylist cards, yummy froyo, the start of physical therapy (with future appointments on the business card), and the empty PL shelves at Hobby Lobby! I made the ampersand card with a sticker from Amy Tangerine's Yes, Please and scrapbook paper from my DIY Project Life kit.


I'll be linking up at The Mom Creative again today for Project Life Tuesday. So thankful for that link party opportunity!

I love reading each and every comment!

Project Life Week 15

Friday, April 26, 2013


Week 15 was a pretty fun week - my mom's birthday was on Tuesday, and mine was on Sunday! I also got to do some crafting - I made Mom's birthday card and did some smashbooking.


Left Side: I've been saving this pretty banner paper to use as the title card for this week. Just like last week, I saved a spot to use up some of the pretty scrapbook paper I've cut up. I added a simple butterfly to the middle of the paper. It's from the 'Sweet Girl' colletion by Echo Park.


I used a Silhouette cut to create a journaling card. It's a little small, so I put a piece of scrapbook paper behind it to make it pop.

project life

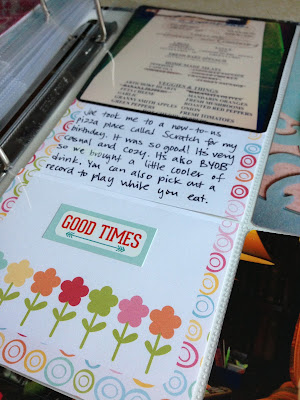
Right Side: a picture of our order at Scratch (a pizza place we ate at for my birthday), an owl spoon rest (how cute is that??!), my new favorite picture of me and hubby, and some pictures from mine and Mom's birthday celebration.

project life

I cut a 6x4 journaling card to fit underneath a 4x4 Instagram picture. Not a perfect fit, but I think it looks fine.

project life

So how are you doing with your PL? Are you keeping up?
Need some inspiration? Check out my project life pinterest board

I'm linking up at the The Mom Creative today.

 
I love reading each and every comment! 
Be sure to keep up with me on Instagram, Pinterest, and Facebook!

Project Life Week 14

Tuesday, April 23, 2013


Week 14 was a pretty calm week. I generally only use iPhone pics in my Project Life, but I had my husband email me a couple of pictures that he took with his new dSLR. We spent the weekend camping.

project life

Left Side: notice that huge rose - it just kept getting bigger every day! It was gorgeous.

project life

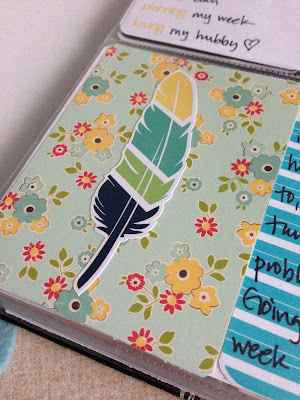
I feel the need to fill up every pocket with a picture or a journaling card or a quote. I haven't been using very much of the scrapbook paper that I cut up, so I made sure to leave a spot for it this week. I added the little feather sticker. I thought it turned out pretty, bright, and cheerful.


I had so much to do this week, so I included a little to-do list. It's from a K&Co Tag pad.

project life

Right Side: this side documents our first camping trip of 2013. We camped in Pigeon Forge, TN and went to Dollywood to renew our season passes and to give Joe a chance to take some pictures with his new dSLR. We also went up to Gatlinburg for the afternoon and ate at Smoky Mountain Brewery.

project life

I'll be linking up at The Mom Creative today for Project Life Tuesday.

I love reading each and every comment! 
Be sure to keep up with me on Instagram, Pinterest, and Facebook!

Smash Your Stash Challenge 8 - Favorite Article of Clothing

Monday, April 22, 2013


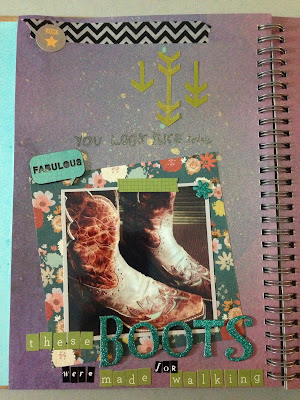
The challenge was to smash a page about your favorite article of clothing. I don't really have a favorite piece of clothing, so I decided to do shoes instead. I feel like I searched for a long time to find the right pair, so I chose my cowboy boots! I'm still using the Red Doodle page for the Challenges. I thought this page was perfect since it already said "you look nice today".

I absolutely love this page - I think it's my favorite page I've ever Smashed! It's so pretty!

red smashbook

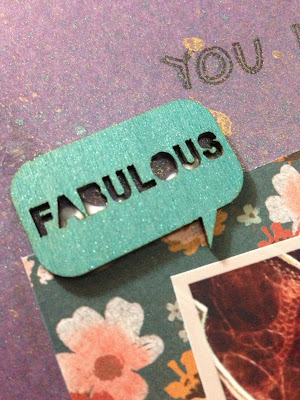
I used Heidi Swapp's Color Shine mists and a wood veneer for the first time ever on this page. I'm really not sure why I haven't used either item until now - I love them both! The Color Shine creates a beautiful sheen and adds just a bit of color. The wood veneer is from a Recollections pack I got at Michael's.


red smashbook


I used some arrows that I cut on my Silhouette a while back. I have an accordion file that I put cuts into for future use. These arrows had 3 little pointy things (technical term, obvi) so I cut them to make all 3 different. I used the Color Shine on the middle arrow.

red smashbook

I used 3 different alphas on this page, including sparkly turquoise Thickers. Love!

red smashbook

What do you think? What is your favorite article of clothing?

I love reading each and every comment! 
Be sure to keep up with me on Instagram, Pinterest, and Facebook!

This time last year: Project Life SMASH book April 2012

Friday, April 19, 2013


In April, I did a better job of documenting some of the little things that happened. On the first page, I put a picture of my "view" for one weekend. I hurt my back and had to lay down for almost the whole weekend! I had my phone, iPad, and DVR to entertain me! On the second page, I included a receipt and a picture of an ice cream date with my friend Jamie. Mom and I celebrated our birthdays together. I had a breakfast date / catch up session with a friend from undergrad that month too. 


Joe surprised me by suggesting a quick trip to Orlando's Univeral Studios and Universal Islands of Adventure to celebrate my birthday. We got engaged at Universal Islands of Adventure, so it's a special place for us. It was a whirlwind trip - we took an evening flight after I got off work Thursday night and came back Sunday afternoon. So fun! I used a page from a SMASH pad to document when and where the trip took place. I saved a photo retrieval paper and layered it underneath a picture of us in Harry Potter world. Perhaps the best surprise was when Joe insisted on leaving the park early on my birthday. I was annoyed but got over it when I saw where he was taking me - to Tiffany's! I got a beautiful key necklace that I had been wanting for a long time. We ate at Bubba Gump's in CityWalk that evening.


I tried to do something a little different on this page - mostly because I had a lot of pictures to include and not a lot of space. I didn't want to cut any out, and I wanted to include some journaling about the trip to Dollywood. I applied washi tape to the front and back of a piece of scrapbook paper to create a flap. I journaled on the flap and hid the pictures behind it. A border punch on the side of the flap allows pictures to peek through.


I love reading each and every comment! 
Be sure to keep up with me on Instagram, Pinterest, and Facebook!


Mom's Birthday Card

Thursday, April 18, 2013

I'm so proud of myself - I made my first card using scrapbook supplies! It's super simple, but so cute! And I finally got to use that flower frog I bought a while back at an antique store. :)

I used October Afternoon's 'Cakewalk' to make the birthday card. I only had the 8x8 papers and the letter stickers to work with - wish I had some of the coordinating embellishments, but I made it work. 


Mom loves vintage-looking illustrations, so I fussy cut the girl and boy holding up the cake. I used pop dots to make them stand out from the page.


I found a short and sweet birthday poem online. I used my Silhouette Cameo sketch pen to write it out for me in a free font (Channel). I love the sketch pen feature - I need to use it more often!


When my brother and I made cards for Mom when we were little, we always drew a flower or wrote something on the back of the card to make it look official - like it was from American Greetings. How cute were we?! So I cut out a little piece of an 8x8 paper and stuck it on the back. Sure enough, she turned the card over and looked at the back and then asked if I remembered doing that as a kid. LOL!


Hope you like it as much as I do!

I love reading each and every comment! 
Be sure to keep up with me on Instagram, Pinterest, and Facebook!

Project Life Week 13

Tuesday, April 16, 2013


I can't believe it's time to post Week 13 already - this year is flying by! I kept it simple and colorful this week. I haven't been feeling my best lately (neck and shoulder injury), but I don't want that to stop me from PLing and I don't want to get behind. I love the butterflies on the week card.

Full Week:


 Left Side: 
More snow (!), the flowers that a sweet customer gave me for helping her, a picture of Joe welding, my Studio Calico PL grab box, and a bird Joe helped after it flew into the window. I used a couple of sn@p cards from Michael's on this side. I'm so glad Joe is sending me more pictures to use in PL :) I had told him a couple months ago that he needed to get better at 'documenting his life'. He's doing good!


Right Side:
Our Easter baskets, a journaling card about how we spent Easter with our families, Mom and Dad playing Bingo at Mellow Mushroom, and some fun critters I saw while antiquing. The 'family' card from Michael's is very fitting because I went antiquing with my parents, and we spent time at both of our parents' houses for Easter and for Dad's birthday. We saw our families more than usual this week! The 'I heart doing this' card was a free printable I found on Pinterest.

*ignore the cards sticking out of the pocket page in front of the 'bingo' card - apparently I stuck something in that pocket to use for next week and I didn't realize it was visible until now!*

I'm linking up at The Mom Creative Project Life Tuesday today.

I love reading each and every comment! 
Be sure to keep up with me on Instagram, Pinterest, and Facebook!

How to make monthly onesie stickers on the silhouette cameo

Monday, April 15, 2013


Sorry I'm a little late posting this - I originally said I was going to post it last week, but life got in the way! Click on the pictures to make them bigger and easier to see. As I do more Cameo related posts, I'm adding the pictures and links to my Pinterest board. Check it out!

I made some monthly onesie stickers to coordinate with the baby book I made for a friend. I used an older scrapbooking line, Basic Grey's Oh! Baby Girl. I was able to find digital papers online at Basic Grey's store, so the stickers are the same patterns found in the baby book. I used the Silhouette white sticker paper and the print and cut feature to make the stickers.


First I imported the digital scrapbooking papers into my Silhouette Library. I then set up my Silhouette page for a sheet of 8.5"x11" sheet of sticker paper, and added the registration marks.


Then I added a cut file of a circle and duplicated it so that there were 4 circles on the page. If you made them a bit smaller, you might be able to get more circles on the page and use 1 less sheet of sticker paper.


Then I selected a circle and opened the fill pattern window. I scrolled down to the bottom to see My Patterns and selected one of the digital papers. At this point, you can go to Advanced Options and change the scale of the pattern if you want to make it bigger or smaller.


Next, I added text to spell out '1 month'. (This is shown on an empty circle so it is easier for you to see).  You can choose the size and font you want. Then I selected the text and opened the fill color window. I used black to fill in the writing, but you can choose whatever color you want.


Open the cut style window and select your text in each circle. Click 'no cut' and make sure that only the circles have red cut lines.


Repeat the steps for each circle (1-12 months). 


Now you're ready to print and cut! Put the white sticker paper into your printer and click the 'send to Silhouette' button. Click the option to 'print now'.


After it's finished printing, put the sticker paper onto your Cameo cutting mat. Allow the Silhouette to automatically detect the registration marks. Then change your settings and select 'printable sticker paper' and cut!


I then cut a library pocket to store the stickers in. Before I cut it, I added 3 onesie cuts to the front of the pocket.


The final outcome is adorable!


I love reading each and every comment! 
Be sure to keep up with me on Instagram, Pinterest, and Facebook!

2013 Project Life Celebratory Blog Hop : My Tips and Tricks

Friday, April 12, 2013


I want to start by saying "hello" to my followers, and "welcome" to some new faces today! I have lots of pictures and lots of info to share with you today.

This is the 6th stop on the Project Life Blog Hop hosted by Margie from the Nihao, Cupcake! blog. I'm so glad to be a part of such an amazing blog hop - there's some great talent being shown today! You can scroll down to the bottom of this post to get to the next stop. Be sure to visit everyone!


I just wanted to take some time to go over some things I've done and things I've learned about Project Life so far this year. After all, we're 25% done for the year - and I'm proud to say that I'm staying caught up and have completed Week 13. When I've been a week or two behind, I've been able to take an afternoon and get caught up. I started a few weeks into the year, so I'm not quite caught up with posting my weekly spreads. I'll be current within a week or two though. I keep up with all of my Project Life inspiration on my PL Pinterest board.


If you've been following my blog for a while, you already know that I made my own kit from my scrapbooking stash. I've added printables from Pinterest and made some graph paper journaling cards to use throughout the year. I also bought a Project Life grab bag from Studio Calico. At first I was trying to stay cohesive with my color choices, but I tend to like a little bit of everything. So maybe it's not all perfectly coordinated - but it works for me! I'm doing two-page spreads each week. I've added inserts on a couple of weeks. I have a variety pack of pocket pages from Becky Higgins. I've bought some different configurations from WRMK at Michael's. I even used baseball card pages for one week (my favorite week so far!)


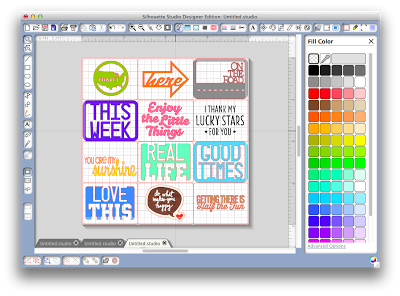
I've used my Silhouette to cut out a few things for Project Life, and can't wait to incorporate it more throughout the year. I had trouble finding horizontal filler and quotes cards when I first started Project Life, so I made some of my own in Silhouette Studio.


When I made my first layout for Project Life, I felt very overwhelmed and didn't know where to start! It's taken a few weeks to find my stride, but I think I have found a method that works for me. 

First of all, I use an app called Momento on my iPhone to keep up with my daily activities. My pictures automatically sync with my Macbook, so they are always up to date. I also keep 'stuff' (tickets, handouts, etc). in a certain place so I can easily access them each week. I encourage my husband to send me pictures that he takes, so my PL won't just be a reflection of my own life. When he sends me pics, I save them to my camera roll so they will sync to iPhoto. I already made my 'week' cards for the year, so I pick one to use for the current week. 


Each week, I get out my PL notebook and make some quick notes about the week. It's easier for me to have things written out. I look at Momento and write down what I did for each day, and look at iPhoto to see if there are any pictures I want to include. I don't include every single thing in my Project Life, but this helps me narrow down what I want to include.


I then try to figure out where I want all the pictures to be. I go ahead and print the pictures I want to highlight for the week and then try to fill in the gaps. I've had a lot of success writing topics and notes about pictures on post-it notes and sticking them on the pocket pages. This way, I can easily move them around if I change my mind. Then I know which size to print the rest of my pictures.


There are some things I include every week - a #currentlylist, an 'on the blog' journaling card that I made, and my mani/pedi. I just started my blog this year, so it's really important to me. I include my mani/pedi because that is my "me time" and I want to remember all the fun things I had done to my nails!

I have a small basket on my scrapbook table that keeps stickers, labels, alphas, frames, and embellishments easily accessible.

I bought a medium organizer box from Close To My Heart to store my Project Life cards. I have them divided by vertical and horizontal filler cards, vertical and horizontal journaling cards, and vertical and horizontal quote cards. I use binder clips to keep them separated.


Here are a few of my favorite Project Life pages (with some close-ups) from this year. You can see them all by clicking on the Project Life label on the right side of my blog.


Ok, the next stop is Barbara.

I hope this insight into my Project Life has inspired you on your journey. I'm always on the lookout for new tips and tricks, so feel free to share yours in the comments! Be sure to visit all the great blog hop participants!!


Maya        http://mayadahan.blogspot.com
Emily        http://mrscraftyadams.blogspot.com <----- you are here!
Barbara    www.maynardpl.blogspot.co.uk <---- go here next!
Katina        www.lovinglifeslittleblessings.com
Nicole       http://nicolemann.blogspot.ca
Brooke       www.graceandlight.typepad.com
Kelli        http://whimsikel.blogspot.com
Shay         http://sbookinshay29.blogspot.com

I love reading each and every comment! 
Be sure to keep up with me on Instagram, Pinterest, and Facebook!

LinkWithin

Related Posts Plugin for WordPress, Blogger...
Proudly designed by Mlekoshi playground